Winter Skirting for Travel Trailers
Camper’s skirting can minimize heat loss through the floor, fortunately skirting is a DIY job that most RV-ers can easily do by themselves....
Trailer’s floor is one of the major sources of the heat loss at low ambient temperatures.
The enclosed, insulated underbelly is the best fix to the problem, however such solutions are available only in four-seasons campers.
Fortunately, every camper (travel trailer, fifth wheel, motor-home…) to some extent can be protected from heat loss by skirting.
There are several kinds of RV skirts, rigid one (for example from plywood) are often installed in “stationary” mobile-homes parked “forever” on the campgrounds.
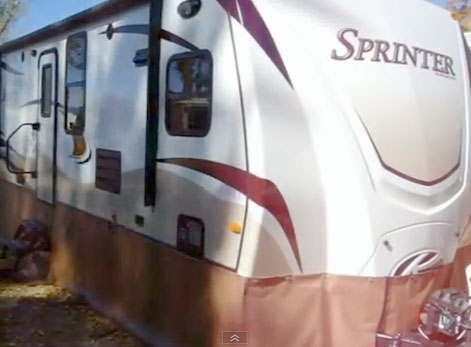
The most popular RV skirts however are made from flexible, weather-resistant tarp (vinyl) and include few (or more) panels to wrap the bottom part of the camper. During the winter, skirting prevents cold air-flows infiltrating the area under the floor of the camper, minimizing this way heat-exchange. The same way skirting also helps to keep camper cool during hot summer days.
The good news – installation of skirts is an easy “do-it-yourself” job that can be done by most RV-ers.
Step-by-step installation process of EZ Snap RV skirting
EZ Snap RV skirting is an inexpensive and professional alternative to having skirting custom fit by costly upholstery shops. The incredibly durable EZ Snap skirting provides RV owners with effective protection against potentially damaging environment and elements. The simple do-it-yourself installation allows RV owners to tailor a perfect fit for their units and no experience is necessary. Just a few basic tools are required for installation.
Skirting RV Trailer helps to keep it warm during the winter and cool during the summer....
To begin with you need a tape measure, a sharp pair of scissors and a marking pencil. If you are using screwing type of studs you will need a power drill. And if you are using the peel and stick adhesive studs - Isopropyl alcohol should be used to clean the surface where you would put the studs.
Steps:
- Determine the size of your RV skirting. First measure the perimeter of the area you wish to cover. Once you have these measurements add them together to find the kit size suitable for you. It is better to include an additional 2 to 5 feet for overlaps where skirting intersects. For height, measure up the highest point you will be skirting up to. You will need at least 6 inches of extra material that will fold under at ground level.
- Mark the locations where you plan to mount your fasteners. Once your kit arrives mark every point for studs at approximately ten inch intervals. Mark just above the area you will mount the studs.
- Now install the studs. Once you have marked out the locations for studs clean the surface of the locations with Isopropyl Alcohol. This will help remove contaminants. Then peel off the lining from the back of the stud which will expose the Very High Bond (VHB) adhesive with strong holding power. Simply press the adhesive studs onto the RV with thumb pressure and hold it for a few seconds. Repeat this as you move around the RV. Ideally the ambient temperature should be at least 60 degree F (15 degree C) during studs’ installation.
- Allow the studs to sit for a minimum of one hour before installing screening material.
- Snap on the EZ Snap pins. Push the pin on to the stud until they touch the base of studs. Repeat this all around the RV.
- Roll out the skirting material and trim accordingly. Allow an extra few feet so that it can be wrapped around the front. You may choose to install your skirting as one continual piece or a number of sections. When using smaller sections account for extra fabric for additional overlaps. EZ Snap carries a specialized Velcro to stick to the skirting so that you may seal the sections together. Draw a line on the fabric and then cut.
- Position the RV skirting. Lift to see it is same height as the fasteners.
- Begin fastening by puncturing the EZ Snap pins through the fabric. Push the pins all the way down so that the fabric comes in contact with base of the pin.
- Measure and cut any excess fabric from skirting above the pins. EZ Snap fabric is non-fray material, so it does not require hemming the edge.
- Lock the fabric into place using the EZ Snap caps. Push the caps on pins.
- Build a base frame around the RV to hold skirting in place. Use EZ Snap Pipe clamp system. These pipes form a frame around the RV. The pipes should lightly touch the ground.
And now let's see the whole process....
By installing EZ Snap RV skirting you will save thousands of dollars compared to a custom fit one. Your RV is now safe from damage during harmful winter months.
.
About Us / Privacy Policy / Resources
Go to: Pop-up Travel Trailers and RVs